# VPN
Authors: tutorial Amolith Seregion, and the Ubuntu App Cats
Contact: info@ubports.com
Category: #Utilities
Where to get it: System Settings
Why do I need a VPN?
Because you want to protect your internet security, privacy and freedom!
VPNs (Virtual Private Networks) are very useful in a variety of situations. Namely, they're used to unblock websites and protect their users' privacy. Check out this article by [Gizmodo] to understand how a VPN actually works.
Configuring VPNs on Ubuntu Touch
Obtain the config file
The first step is obtaining the .ovpn file from your VPN provider. Some VPN service providers (like [WINDSCRIBE]), require a Pro account to accomplish this and others like [ProtonVPN] don't.
Community members have also reported creating their own VPN server on a Raspberry Pi 3 B with [PiVPN] and have had good success. Your Pi will work almost the same way as a commercial server, depending on the software you use. Using PiVPN it will encrypt your connection like the majority of VPN providers. You will get and have a secure connection to the internet wherever you are - maybe not quite as reliable as something like ProtonVPN with their Secure Core feature - but you will use your own bandwidth and you will get the fastest speed.
The decision of how you select your VPN server just depends on your needs. If you are considering choosing a commercial VPN service providers it is important that the company respects users’ privacy. This means your VPN connections remain private and there will not be stored any information such as from where you signed in or for how long you were logged in: no logging whatsoever.
ProtonVPN Secure Core mode: to improve user privacy and data security by mitigating some of the risks from a compromised VPN server.
A common method to expose VPN traffic is by compromising the server that handles your traffic. This risk is particularly acute when the server is located in a high risk jurisdiction. To mitigate this risk, ProtonVPN employs a technique called Secure Core architecture to defend against network attacks.
A classical VPN setup involves a client passing traffic through a VPN server en-route to the final destination. This means an attacker that has control of the VPN server, or the ability to monitor the network of the VPN server, will be able to match VPN clients with their destination, nullifying the privacy benefits of the VPN.
Secure Core allows to defend against this threat to VPN privacy by passing user traffic through multiple secure servers connected to the Internet using Proton own dedicated network with IP addresses that are owned and operated by our own Local Internet Registry (LIR).
While there is no such thing as 100% security these measures provide us with a much higher level of certainty that ProtonVPN Secure Core servers and network are not being tampered with.
Back to our configuration now. Unfortunately, Ubuntu Touch does not have the option to import .ovpn files yet (this is a planned feature, however) so we'll have to look at each part of the config file and create different files to import into the VPN configuration part of the System Settings.
Once you have downloaded the .ovpn file to your PC, open it in any text editor and take a look at the contents.
It is also possible to do all of this from your phone with nano and a few terminal sessions, however it would be immensely easier from your PC.
Creating the files
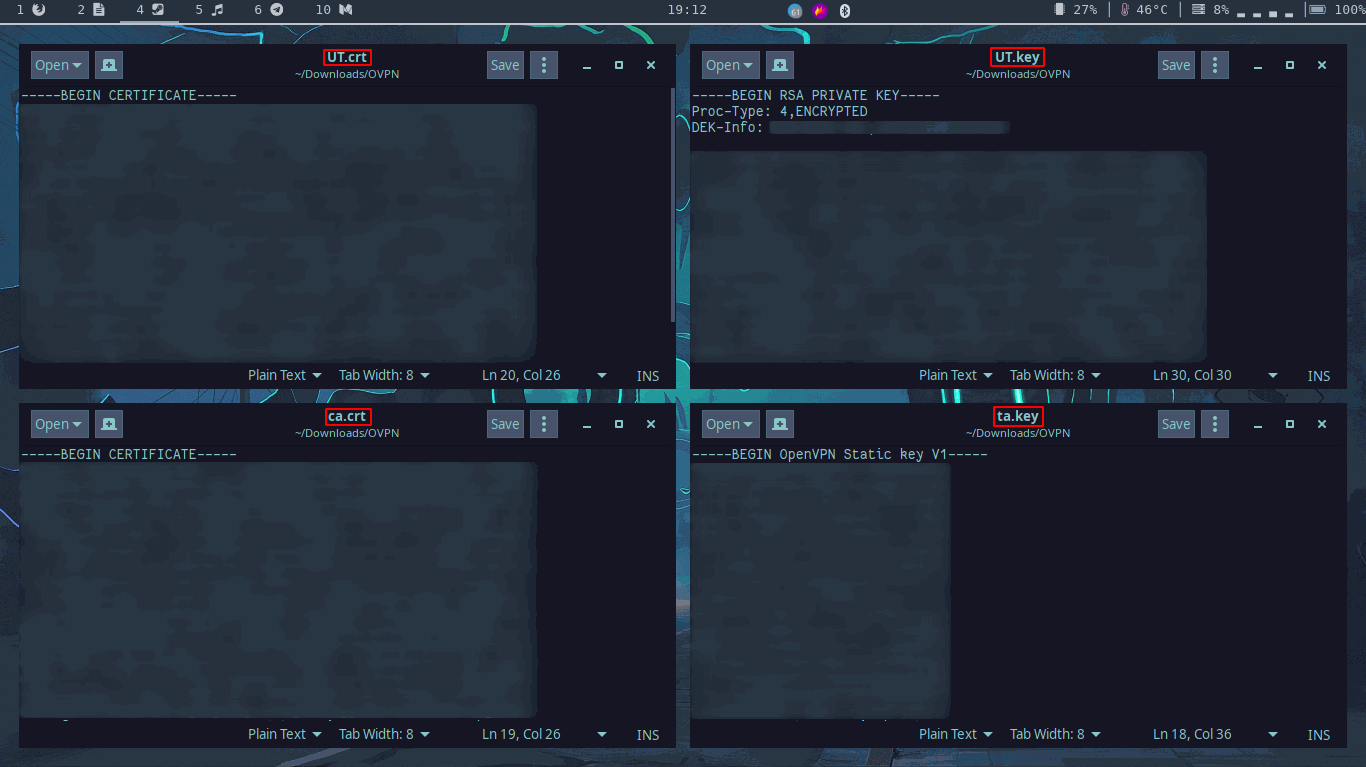
Public certificate
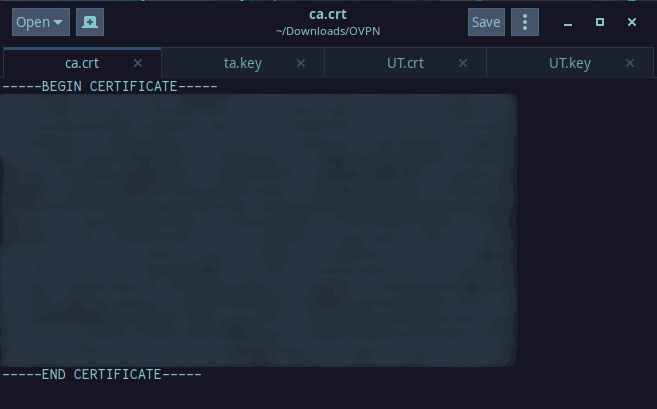
The first file to create will be named ca.crt . The contents of this file are in the first `BEGIN CERTIFICATE` section of the .ovpn file:
Copy and paste everything from `-----BEGIN CERTIFICATE-----` to `-----END CERTIFICATE-----` like this:

so the resulting file looks like this:
Client Certificate
The second file to create is the private certificate for your device. It will be named client1.crt where client1 is the name you gave your device.
For example, crating your own .ovpn config file, you can perhaps chose to name it UT (for Ubuntu Touch), the resulting file name will be UT.ovpn This way the name of the client certificate file will be UT.crt .
The information for this file is the next `BEGIN CERTIFICATE` section of your .ovpn file:
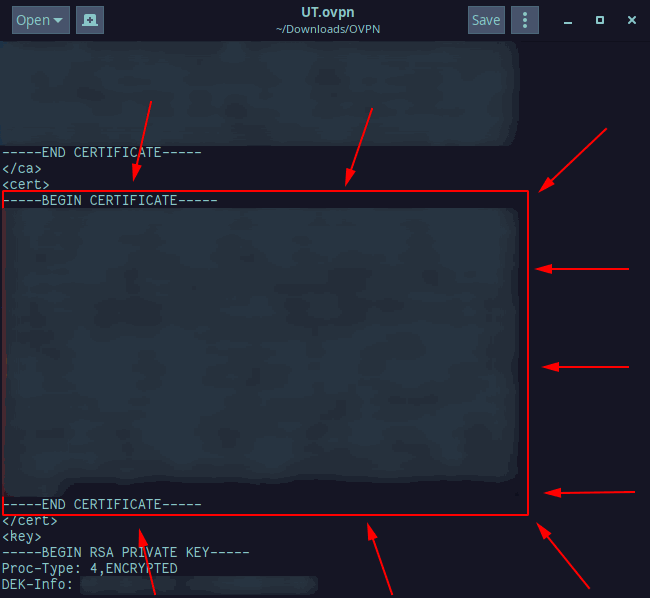
Do the same as you did with ca.crt and copy/paste the section in the red square into the new file named client1.crt where you've replaced client1 with whatever your .ovpn file is named.
The resulting file will look like this:
Private Key
The third file is the private key for the VPN. This will be named client1.key where client1 has been replaced with whatever your .ovpn is named.
This information is in the next section that looks like this:
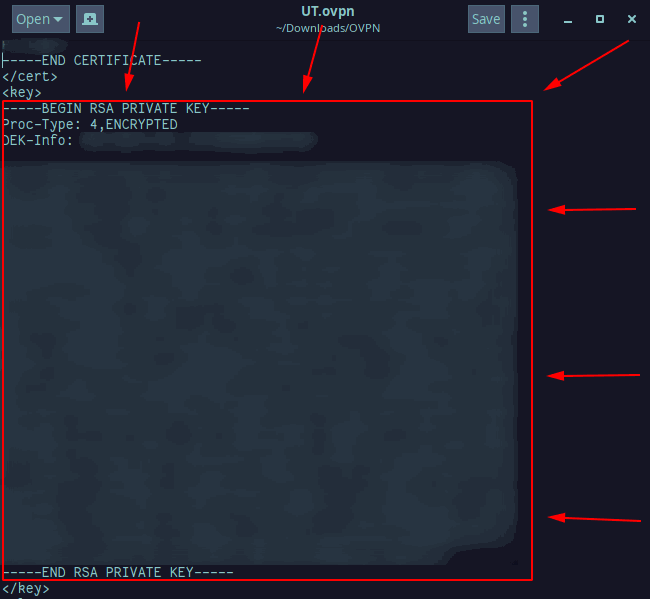
Again, copy and paste this section into a new file named client1.key where client1 is replaced with whatever your .ovpn file is named, and save it like the rest.
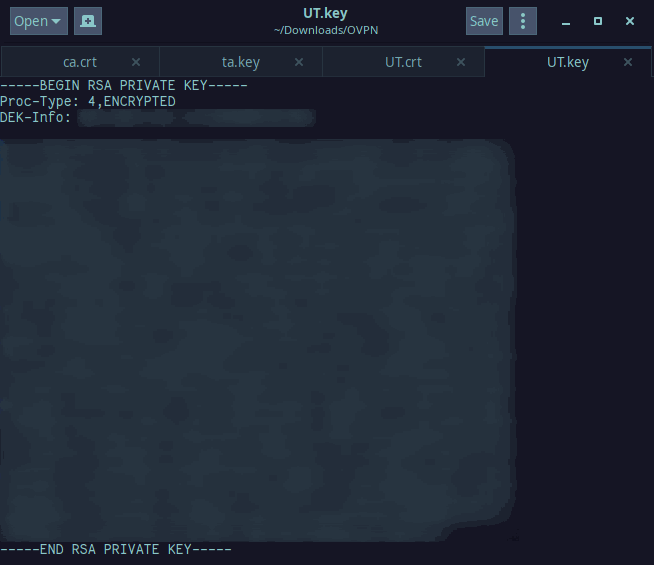
The resulting file will look like this:
Public Key
The last file you need to create is your public key and that is the last section of the .ovpn file. The public key file will be named ta.key and the information to copy/paste is found here:
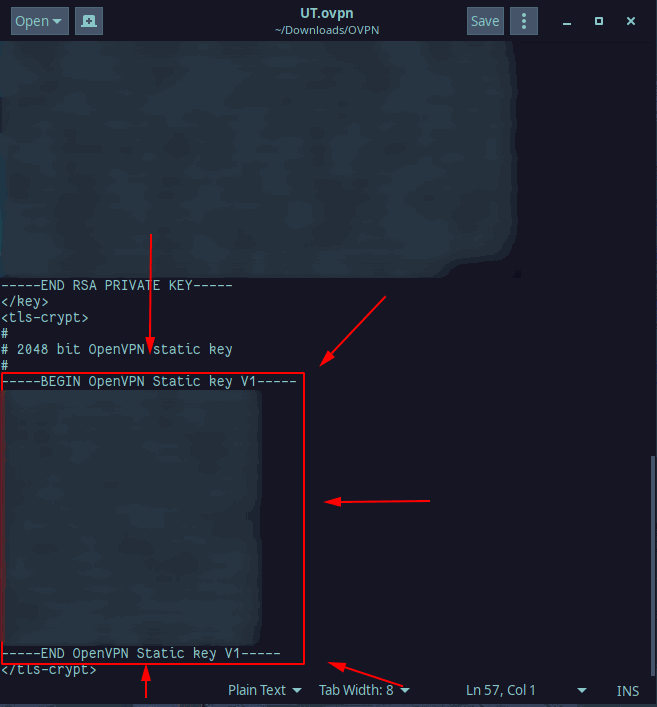
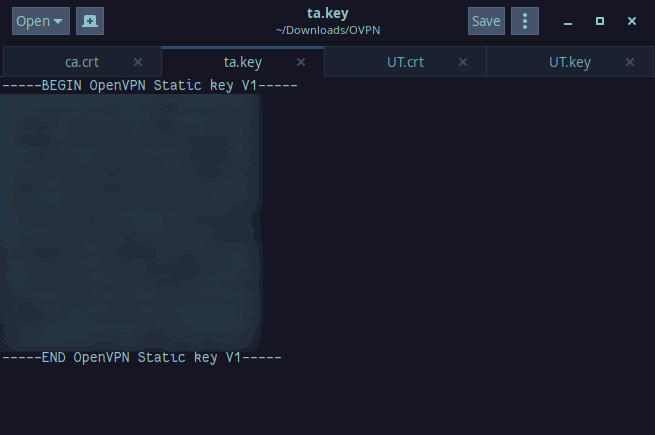
The final file will look like this:
In total
In total, you should now have four files; ta.key, client1.key, ca.crt, and client1.crt .
In my case, client1 has been replaced with UT because the .ovpn file was named UT.ovpn by the VPN service that generated it.
Sending the files to your UT phone
The easiest way to get the files to your phone would be to simply use a cable, mount your phone, and copy them to your `~/Downloads` folder.
In case you do not have a cable you can zip the folder and put them all in into an archive named VPN-config.zip. Upload that archive to send.firefox.com, sent the URL to your self using Telegram (or email), download the zip archive straight to your ~/Downloads directory, open the Terminal app, and run the following commands to unzip the archive and remove it:
cd ~/Downloads
unzip VPN-config.zip
rm VPN-config.zip
Configuration in UT
Now comes the actual configuration on your Ubuntu Touch phone. Open the System Settings , tap on the VPN button, and tap Add Manual Configuration.
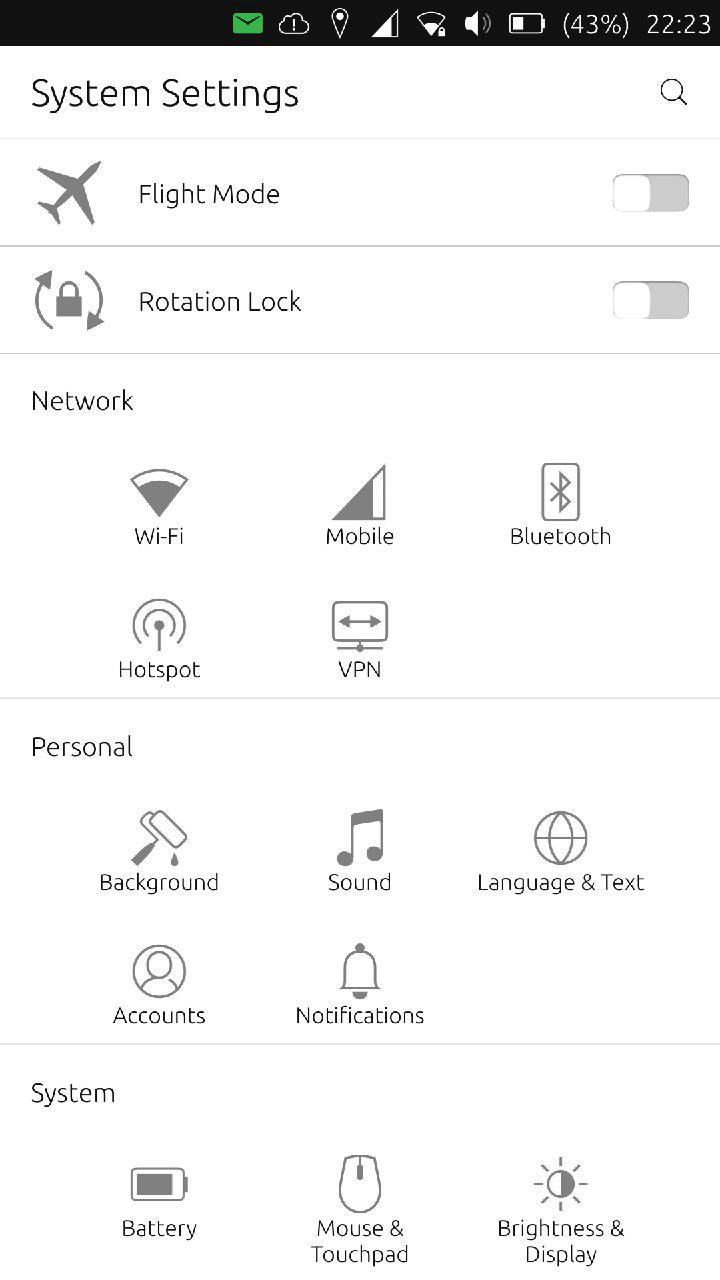
System Settings
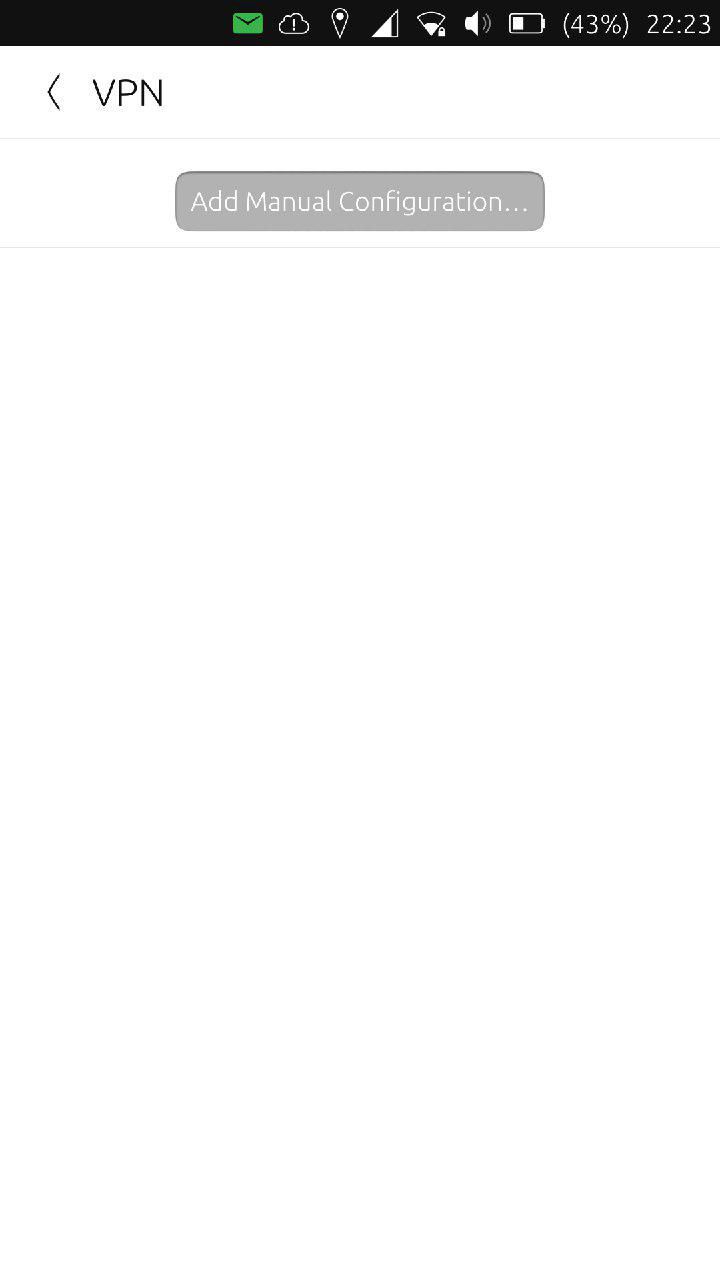
Add Manual Configuration
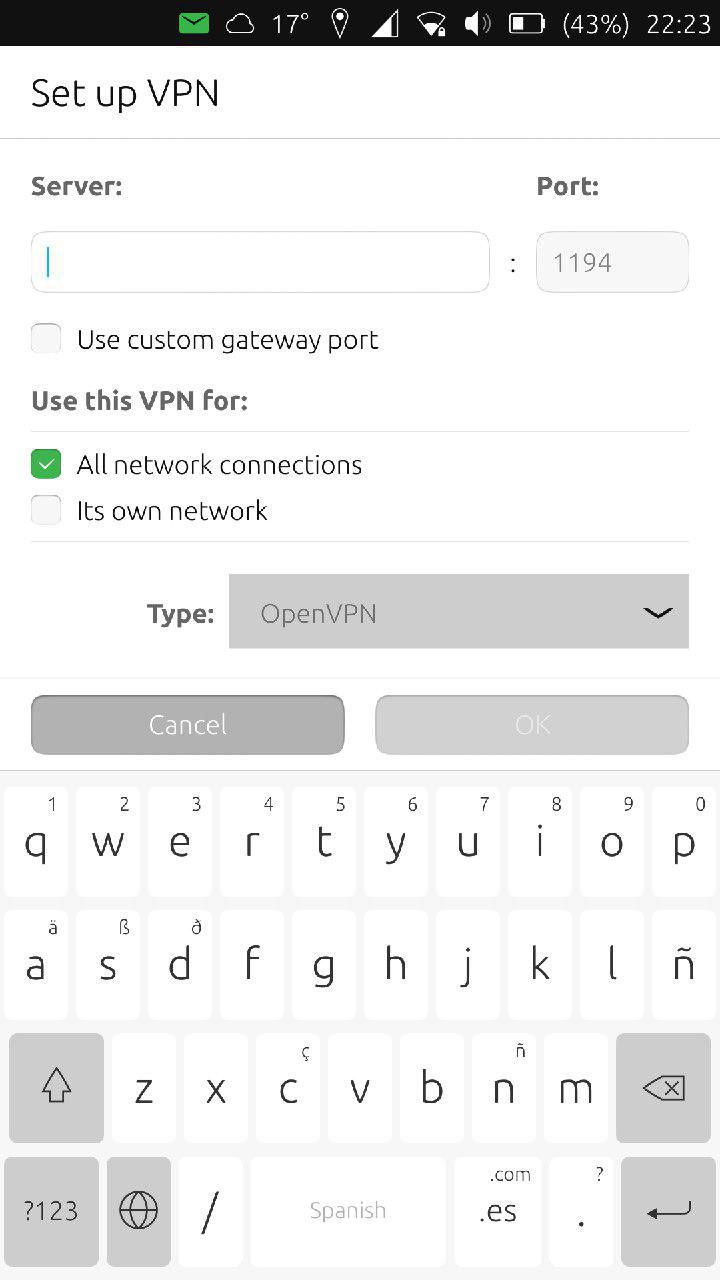
Setup VPN
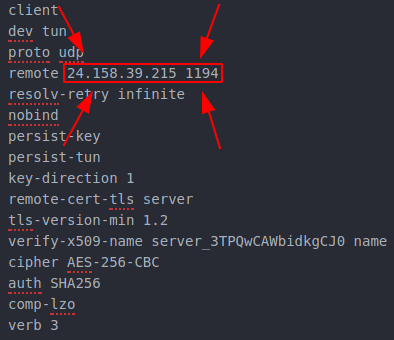
The first thing to fill out is "Server:" and Port:. Here, you'll insert the information shown in bellow screenshot. The first string of number is the IP address that goes in the "Server:" box and the second number is what goes in the "Port:" box. However, if your .ovpn file uses a different port, you'll need to check "Use custom gateway port" underneath "Server:"
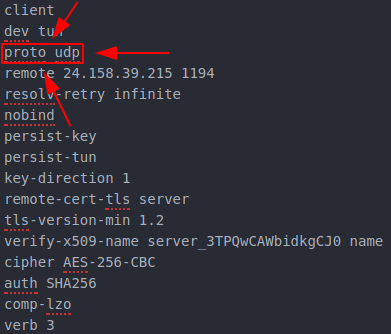
The protocol will typically be UDP but you can verify that by looking at this line (proto is short for protocol)
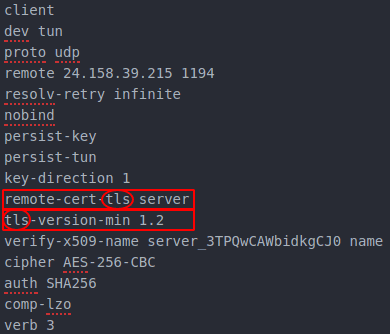
The certificate type will typically be TLS but you can confirm by looking at these lines:
If you are given a password by your VPN provider or set a password with your own VPN server, select Password or Password with TLS if you have both certificates and a password to use. If you need a password, it will be provided by your VPN provider or set by you with your own server.
In our example, we choose a password when we created our .ovpn file from our server so that's what we'll continue with, however the process will be the same (except for entering username, if you have one, and password).
Go ahead and import the client certificate, private key, and CA certificate, check Use additional TLS authentication and import the public key.
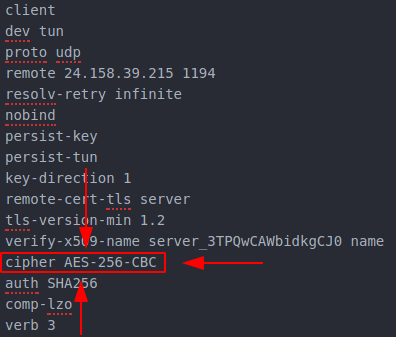
The last thing to do is select the cipher, which is found here:
When you're done, tap OK and see if it works!
Titel
Web address / Source Code:https://github.com/ubports/system-settings
Licence: GNU GPL v3
Original language: English
What do you think of this app?
Please send your comments and suggestions through the box at the bottom of this blog.
Explore the full spectrum of Ubuntu Touch Apps at OpenStore - The official Ubuntu Touch app store.